本文不是最佳实践,参考:https://www.liuvv.com/p/b37651.html
因为 blog 涉及的本地依赖过多, 特意放到 docker 上, 方便发布博客和移植。制作镜像的时候,尽量选择国外服务器,国内的服务器下载包很容易陷入死循环。
1. 宿主机准备(gcp)
参考:https://www.liuvv.com/p/b7e5827a.html
1.1 安装 Docker
1
2
| apt update
apt install -y docker.io
|
1.2 宿主机开启镜像加速
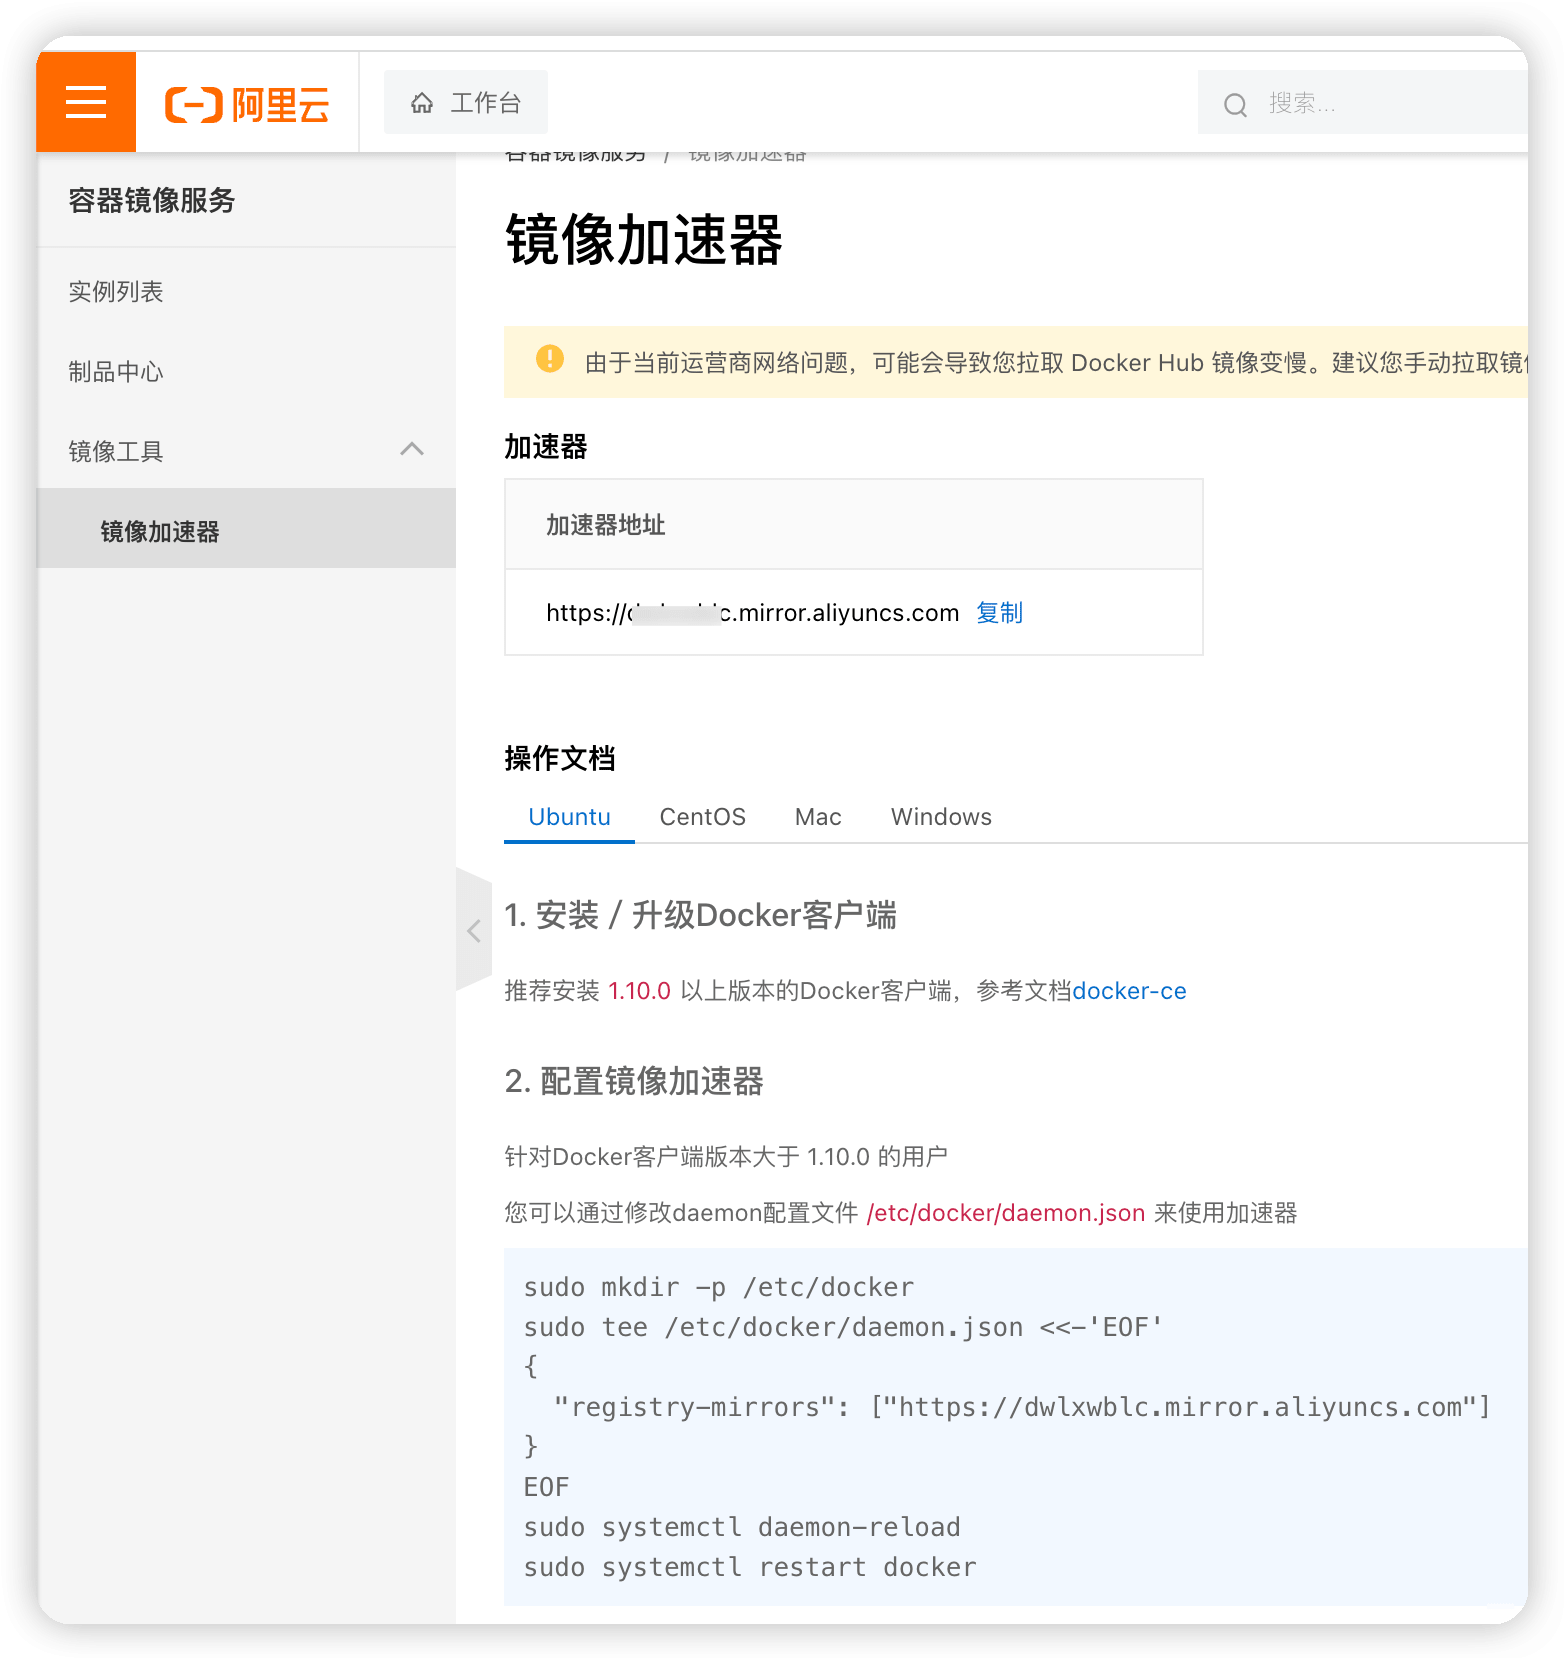
https://cr.console.aliyun.com/cn-beijing/instances/mirrors 先给本机来个加速。
1
2
3
4
5
6
7
8
9
10
11
12
| sudo mkdir -p /etc/docker
sudo tee /etc/docker/daemon.json <<-'EOF'
{
"registry-mirrors": ["https://xxxx.mirror.aliyuncs.com"]
}
EOF
sudo systemctl daemon-reload
sudo systemctl restart docker
|
2. 制作基础镜像 (levon_blog_base)
https://cr.console.aliyun.com/cn-beijing/instance/repositories
2.1 创建容器安装依赖
1
2
3
4
5
6
7
8
9
10
11
12
13
14
15
16
17
18
19
20
21
22
23
24
25
26
27
28
29
|
docker run -itd --name levon_blog_base ubuntu
docker exec -it levon_blog_base /bin/bash
apt update
apt install -y vim
apt install -y git
apt install -y curl
curl -o- https://raw.githubusercontent.com/nvm-sh/nvm/v0.39.5/install.sh | bash
nvm install v14
nvm use 14
node -v
apt install -y npm
npm install hexo-cli -g
git config --global core.quotepath false
git config --global gui.encoding utf-8
git config --global i18n.commit.encoding utf-8
git config --global i18n.logoutputencoding utf-8
git config --global alias.lg "log --color --graph --pretty=format:'%Cred%h%Creset -%C(yellow)%d%Creset %s %Cgreen(%cr) %C(bold blue)<%an>%Creset' --abbrev-commit"
export LESSCHARSET=utf-8
|
2.2 增加相关配置
1
2
| git config --global user.email "levonfly@gmail.com"
git config --global user.name "unix2dos"
|
1
2
| mkdir .ssh
vi ~/.ssh/config
|
1
2
3
4
5
6
7
8
9
10
11
12
13
14
15
16
| Host coding e.coding.net
HostName e.coding.net
IdentityFile ~/.ssh/github-unix2dos
User levonfly
Host github.com
HostName github.com
IdentityFile ~/.ssh/github-unix2dos
User unix2dos
Host unix2dos
HostName github.com
IdentityFile ~/.ssh/github-unix2dos
User unix2dos
Host levonfly
HostName github.com
IdentityFile ~/.ssh/github-levonfly
User levonfly
|
1
2
3
4
|
chmod 600 ~/.ssh/github-unix2dos
chmod 600 ~/.ssh/github-levonfly
|
1
2
3
| cd ~ && mkdir workspace && cd workspace/
git clone git@github.com:unix2dos/blog_readwrite.git
rm ~/workspace
|
2.3 构造并上传镜像
Docker Hub 免费版只有 1 个私有库,5 个私有库要 7 美元一个月(倒也不是给不起这个钱,只是确实穷….)。自己搭 Docker Registry 又嫌麻烦,就放到国内的阿里了(免费)。
https://cr.console.aliyun.com/cn-beijing/instance/repositories 华北 2(北京)
1
2
3
4
5
6
7
8
9
10
11
12
13
14
15
16
17
|
docker commit -a "levonfly" -m "levonfly的博客基础环境" efb25f31a0a0 levonfly/levon_blog_base
docker login --username=l6241425 registry.cn-beijing.aliyuncs.com
docker tag levonfly/levon_blog_base registry.cn-beijing.aliyuncs.com/levonfly/levon_blog_base:1.0
docker push registry.cn-beijing.aliyuncs.com/levonfly/levon_blog_base:1.0
docker run -itd --name hexo_base registry.cn-beijing.aliyuncs.com/levonfly/levon_blog_base:1.0
docker exec -it levon_blog_base /bin/bash
|

3. 制作镜像和使用 (blog)
3.1 下载基础镜像
https://cr.console.aliyun.com/cn-beijing/instance/repositories
1
2
3
4
5
6
|
docker login --username=l6241425 registry.cn-beijing.aliyuncs.com
docker run -itd --name levon_blog_base registry.cn-beijing.aliyuncs.com/levonfly/levon_blog_base:1.0
docker exec -it levon_blog_base /bin/bash
|
3.2 Blog1 (liuvv)
1. 下载基础镜像和数据
1
2
3
4
5
6
7
8
9
10
11
12
13
14
15
16
17
18
19
20
21
22
23
24
25
26
27
28
29
30
31
32
33
34
35
36
37
|
docker rm -f levon_blog_base
docker run -itd --name levon_blog_base registry.cn-beijing.aliyuncs.com/levonfly/levon_blog_base:1.0
docker exec -it levon_blog_base /bin/bash
cd ~ && mkdir workspace && cd workspace/
git clone --depth 1 git@github.com:unix2dos/blog-liuvv.git
cd blog-liuvv && git submodule update --init
npm i
git clone https://github.com/theme-next/theme-next-jquery-lazyload source/lib/jquery_lazyload
git clone https://github.com/theme-next/theme-next-pace source/lib/pace
git clone https://github.com/theme-next/theme-next-reading-progress source/lib/reading_progress
git clone https://github.com/theme-next/theme-next-needmoreshare2 source/lib/needsharebutton
git clone https://github.com/theme-next/theme-next-han source/lib/Han
git clone https://github.com/theme-next/theme-next-fastclick source/lib/fastclick
git clone https://github.com/theme-next/theme-next-fancybox3 source/lib/fancybox
hexo server --config source/_data/next.yml
hexo clean --config source/_data/next.yml && hexo g -d --config source/_data/next.yml
./deploy.sh
|
2. 制作镜像
1
2
3
4
5
6
7
8
9
10
11
12
13
|
docker ps
docker commit -a "v1.0.0" -m "blog_liuvv" 66b6a88bed57 levonfly/blog_liuvv
docker tag levonfly/blog_liuvv registry.cn-beijing.aliyuncs.com/levonfly/blog_liuvv:v1.0.0
docker push registry.cn-beijing.aliyuncs.com/levonfly/blog_liuvv:v1.0.0
docker tag levonfly/blog_liuvv registry.cn-beijing.aliyuncs.com/levonfly/blog_liuvv:lastest
docker push registry.cn-beijing.aliyuncs.com/levonfly/blog_liuvv:lastest
|
3. 使用镜像
1
2
3
4
5
|
docker run -itd --name blog_liuvv registry.cn-beijing.aliyuncs.com/levonfly/blog_liuvv:lastest
docker exec -it blog_liuvv /bin/bash
|
3.3 Blog2 (readwrite)
1. 下载基础镜像和数据
1
2
3
4
5
6
7
8
9
10
11
12
13
14
15
16
17
|
docker run -itd --name levon_blog_base registry.cn-beijing.aliyuncs.com/levonfly/levon_blog_base:1.0
docker exec -it levon_blog_base /bin/bash
cd ~ && mkdir workspace && cd workspace/
git clone --depth 1 git@github.com:unix2dos/blog-readwrite.git
cd blog-readwrite && git submodule update --init
npm i
hexo server --config source/_data/next.yml
hexo clean --config source/_data/next.yml && hexo g -d --config source/_data/next.yml
./deploy.sh
|
2. 制作镜像
1
2
3
4
5
6
7
8
9
10
11
12
13
14
15
16
|
docker ps
docker commit -a "v1.0.0" -m "blog_readwrite" d8cccfedee06 levonfly/blog_readwrite
docker tag levonfly/blog_readwrite registry.cn-beijing.aliyuncs.com/levonfly/blog_readwrite:v1.0.0
docker push registry.cn-beijing.aliyuncs.com/levonfly/blog_readwrite:v1.0.0
docker tag levonfly/blog_readwrite registry.cn-beijing.aliyuncs.com/levonfly/blog_readwrite:lastest
docker push registry.cn-beijing.aliyuncs.com/levonfly/blog_readwrite:lastest
|
3. 使用镜像
1
2
3
4
5
|
docker run -itd --name blog_readwrite registry.cn-beijing.aliyuncs.com/levonfly/blog_readwrite:lastest
docker exec -it blog_readwrite /bin/bash
|
3.4 使用问题
- 如果 docker 内无法访问 github,可以尝试替换代理试试。
4.参考资料