0%

hugo博客自动化部署到github和云服务器上

新的博客系统准备使用hugo, 更想专注于写, 而不是写完每次都敲命令部署, 接下来搞下自动化部署.

另外blog要实现国内外分流进行加速, 国外去访问github page, 国内访问cdn, 或者自己的云服务器上(双十一撸的一直在吃灰)

1. github page 自动部署

1.1 gh-pages 分支

github 项目新建 gh-pages 分支后, 会自动部署github page上, 所以利用这个特性, 把生成的静态文件提交到 gh-pages 分支上.

  • 创建gh-pages分支
1
2
3
4
5
6
# 初始化gh-pages branch
git checkout --orphan gh-pages
git reset --hard
git commit --allow-empty -m "Initializing gh-pages branch"
git push origin gh-pages
git checkout master
  • deploy.sh
1
2
3
4
5
6
7
8
9
10
11
12
13
14
15
16
17
18
19
20
21
22
23
24
25
26
27
28
29
30
#!/bin/sh

# 删除public文件夹
rm -rf public
mkdir public
rm -rf .git/worktrees/public/
git worktree add -B gh-pages public origin/gh-pages
rm -rf public/*
echo "Generating site"
hugo -D


# 放入CNAME
echo "www.realhttp.com" > public/CNAME


# 提交信息
echo "Updating gh-pages branch"
msg="rebuilding site `date`"
if [ $# -eq 1 ]
then msg="$1"
fi
cd public && git add --all && git commit -m "$msg"


# 推送到 gh-pages 分支
echo "Push to origin gh-pages"
git pull origin gh-pages
git push origin gh-pages
cd .. && rm -rf public

每次写完blog, 运行一下脚本即可

1.2 github action 配置

第一种方案, 提交文章后还要执行一次脚本, 通过github action, 可以做到提交文章自动部署, 即CI/CD

  • hugo主题

    hugo的主题, 尽量保证是git submodule维护的

    1
    git submodule add https://github.com/g1eny0ung/hugo-theme-dream.git themes/dream

    look一下

    1
    2
    3
    4
    5
    cat .gitmodules

    [submodule "themes"]
    path = themes/dream
    url = https://github.com/g1eny0ung/hugo-theme-dream.git
  • 编写github action

    去项目的Actions增加自己的workflow
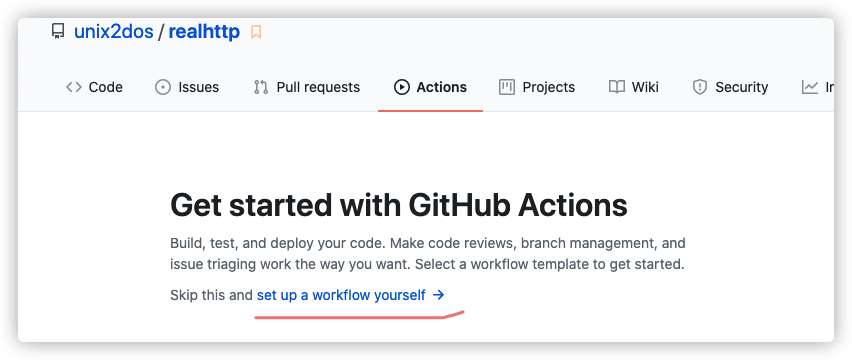
    1

    内容如下:

    1
    2
    3
    4
    5
    6
    7
    8
    9
    10
    11
    12
    13
    14
    15
    16
    17
    18
    19
    20
    21
    22
    23
    24
    25
    26
    27
    28
    29
    30
    31
    name: github pages

    on:
    push:
    branches:
    - master # 这里是提交到master分支就立即触发job
    pull_request:

    jobs:
    deploy:
    runs-on: ubuntu-18.04
    steps:
    - uses: actions/checkout@v2
    with:
    submodules: true # Fetch Hugo themes (true OR recursive)
    fetch-depth: 0 # Fetch all history for .GitInfo and .Lastmod

    - name: Setup Hugo
    uses: peaceiris/actions-hugo@v2
    with:
    hugo-version: '0.83.1'

    - name: Build
    run: hugo --minify

    - name: Deploy
    uses: peaceiris/actions-gh-pages@v3
    with:
    github_token: ${{ secrets.GITHUB_TOKEN }} # 这里不用动, 默认就好
    publish_dir: ./public # 注意是hugo的public文件夹
    cname: www.realhttp.com # cname

2. 云服务器自动部署

2.1 国内外分流

首先先设置国内外分流, 就要求同一个域名, 不同的线路指向不同的地址: 如下图

1
1

境内我指向了我的云服务器, 境外我指向了github page, 国外github已经帮我们处理好了, 接下来需要处理一下国内的访问.

2.2 国内nginx配置

国内访问域名已经实现了访问云服务器, 这时候需要配置nginx访问到相应的静态资源.

1
2
3
4
5
6
7
8
9
10
11
12
13
14
15
16
17
18
19
20
21
22
23
24
server {
listen 80;
listen [::]:80;
server_name realhttp.com www.realhttp.com;
return 301 https://www.realhttp.com$request_uri;
}

server {
listen 443 ssl;
listen [::]:443 ssl;
server_name realhttp.com www.realhttp.com;

ssl_certificate /etc/nginx/ssl/realhttp/1_www.realhttp.com_bundle.crt;
ssl_certificate_key /etc/nginx/ssl/realhttp/2_www.realhttp.com.key;
ssl_session_timeout 5m;
ssl_protocols TLSv1 TLSv1.1 TLSv1.2;
ssl_ciphers ECDHE-RSA-AES128-GCM-SHA256:HIGH:!aNULL:!MD5:!RC4:!DHE;
ssl_prefer_server_ciphers on;

root /var/www/hugo/;
location / {
index index.html index.htm;
}
}

静态资源放在了/var/www/hugo/ 下, 接下来需要通过github action 自动把生成的静态资源部署到云服务器该文件夹内.

2.3 github action配置

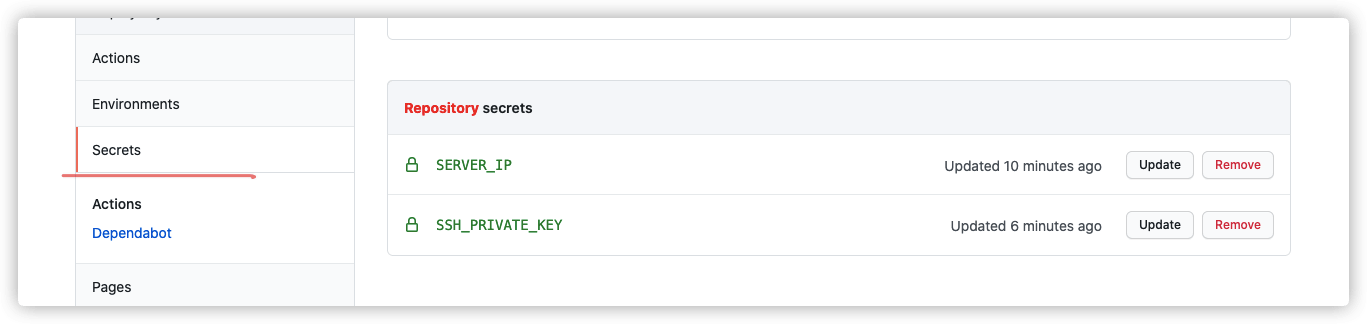
因为需要部署到云服务, 所以需要github通过私钥有访问服务器的权限, 需要在项目里加上私钥和服务器ip.

在项目->Settings->Secrets, 添加相应的变量

1

  • github action 配置如下
1
2
3
4
5
6
7
8
9
10
11
12
13
14
15
16
17
18
19
20
21
22
23
24
25
26
27
28
29
30
31
32
33
34
35
36
37
38
39
40
name: github pages

on:
push:
branches:
- master # 这里是提交到master分支就立即触发job
pull_request:

jobs:
deploy:
runs-on: ubuntu-18.04
steps:
- uses: actions/checkout@v2
with:
submodules: true # Fetch Hugo themes (true OR recursive)
fetch-depth: 0 # Fetch all history for .GitInfo and .Lastmod

- name: Setup Hugo
uses: peaceiris/actions-hugo@v2
with:
hugo-version: '0.83.1'

- name: Build
run: hugo --minify

- name: Deploy Github
uses: peaceiris/actions-gh-pages@v3
with:
github_token: ${{ secrets.GITHUB_TOKEN }} # 这里不用动, 默认就好
publish_dir: ./public # 注意是hugo的public文件夹
cname: www.realhttp.com # cname

- name: Deploy Tencent Cloud
uses: wlixcc/SFTP-Deploy-Action@v1.2.1
with:
username: 'root' #ssh user name
server: '${{ secrets.SERVER_IP }}' #引用之前创建好的secret
ssh_private_key: ${{ secrets.SSH_PRIVATE_KEY }} #引用之前创建好的secret
local_path: './public/*' # 对应我们项目public的文件夹路径
remote_path: '/var/www/hugo' # 对应云上的目录

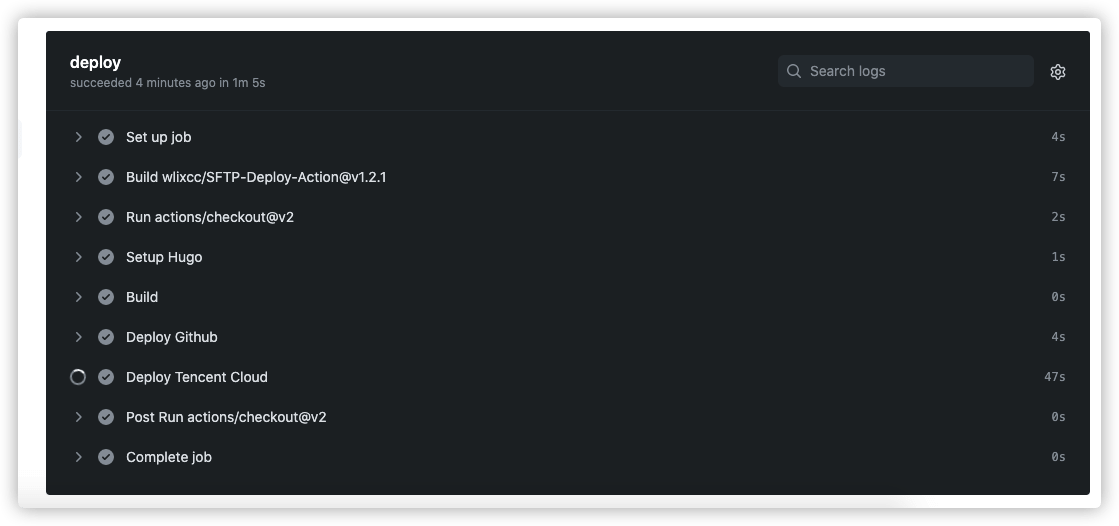
在项目的Actions下可以看到相应的执行状态:

1

3. 参考资料

给作者打赏,可以加首页微信,咨询作者相关问题!